EMERGENCY COMPOSITE REPAIR SOLUTION FOR TANK AND PRESSURE VESSEL REINFORCEMENT
| DEFECT TYPE | Leaking defect |
| DETAILS | TANK DETAILS: Water tank - 18.9 x 8.1 1/2 OD - installation temperature 50°C |
| LOCATION | QUEBEC, MONTREAL |
| 3X PRODUCT | TANKiT® |
OVERVIEW
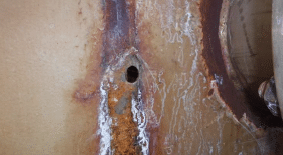
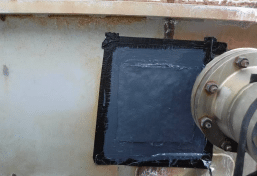
The objective of the repair performed by 3X ENGINEERING (3X) distributor in Quebec – ATELIER AHR – was to reinforce a water tank by sealing a leak of about 25mm diameter.
SCOPE OF WORK
After analysis of the tank and defect characteristics, it was decided to use the TANKiT®, emergency composite patch repair system specifically designed to repair damaged tank. This solution is suitable for tanks up to 20m Ø and defects (leaking or not) up to 100mm Ø, and is made of 5 Kevlar® patches 300x300mm impregnated with a bi-component epoxy resin.
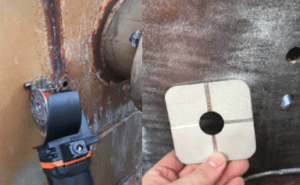
Surface preparation was completed on the area to be fixed (previously delimited with adhesive tape), using Bristle Blaster® machine, to remove rust and foreign matters and get a good surface roughness (minimum of a Rz of 60 µm). This step is essential to ensure a good bonding between the tank surface and the patch composite.
Before composite patching, dew point, moisture and surface temperature were checked and the surface was cleaned and degreased.
Composite repair was then performed as per the following steps:
1. Filler & metallic plate application. A thick layer of F3X8 filler was applied in the surrounding area of the hole. The metallic plate, initially prepared using Bristle Blaster®, was recovered with F3X8 filler and applied on the defected area using magnets.
2. Resin application. After filler curing, the surface was then covered with 3X specific epoxy resin (R3X5) to ensure good wetting and impregnation of the Kevlar® tape.
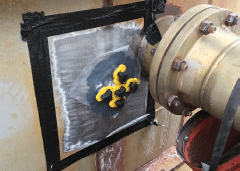
3. Kevlar® patches application (5 layers). First Kevlar® patch (previously impregnated with R3X5 on both side) was applied over the defect using paintbrush and making sure to remove all air bubbles. The next 4 Kevlar® patches were then applicated similarly and perfectly overlaid on each other.
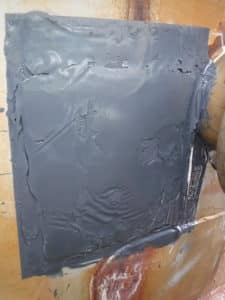
4. Finalization of the repair. Final layer of R3X5 resin was applied on the edges of the repair system for protection and identification plate was positioned on the tank for traceability. Rigid cover plate was finally applied using magnets to compress the patch and keep the position during the curing.
RESULTS
The repair was successfully performed and the integrity of the water tank was restored using the TANKiT®. An anti-UV coating was applied over the patching by the client to ensure good ageing of the repair.

